
Buttons v1.6.0 introduces User Management, available in the Pro tier with a local database and in the Enterprise tier with SSO providers. The Auth section is divided into Users, Roles, and Sessions, allowing administrators to create users, assign roles with specific permissions, and manage authentication methods like NFC cards and PIN codes. The System Administrator account, created during installation, cannot be deleted and should not be used for other users.
Understanding Role-Based Access Control (RBAC)
At its core, Role-Based Access Control (RBAC) is a method of regulating access to resources based on the roles of individual users within an enterprise. Instead of assigning specific permissions to every single person, you assign permissions to roles, and then assign users to those roles.
How RBAC Components Work Together
The system typically operates on a four-tier relationship:
Users: The actual people or service accounts (e.g., employees, contractors, or software bots).
Roles: Job functions or titles (e.g., Administrator, Editor, Viewer, HR Manager).
Permissions: The specific "rights" to perform actions (e.g., Create, Read, Update, Delete—often called CRUD).
Sessions: The mapping between a user and the roles they are actively using at a given time.
When you enter the Auth, it is divided into three distinct sections: Users, Roles and Sessions.
Under the Users section, you can add users to your system. During the installation process, a new user is automatically added to the system. If you migrated from an earlier version, your previous user have been migrated into the users database with all system rights. This user is the System Administrator and cannot be deleted. We recommend not using this account for any other user but rather creating personalized accounts for each user who needs access to the UI or restricted sections on the surfaces. The System Administrator account is also the account that is changed using the Reset Admin Password option in the watchdog.
Create a new User
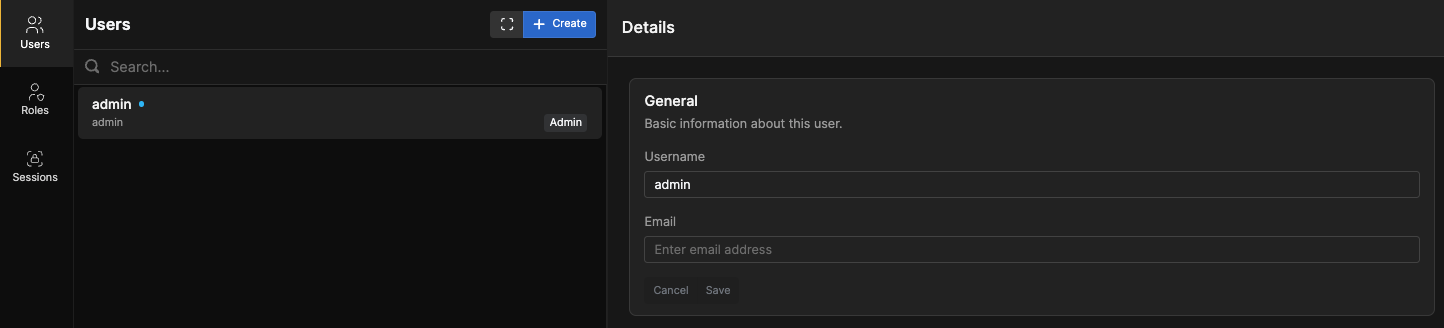
To create a new user click the blue +Create button, this will bring up a dialog box, fill in the relevant name of the user and it will suggest a username for you. The users email is nice to have for the next stepp in this process and lastly you can select one or more roles depending on how you have set them up.
Lastly click somewhere in the dialog box to close the Roles selector, and click the Create button.
This will bring you back to the users page
Send the link to the user for them to create a password.
If you are working on the machine that buttons is running on, the link will show localhost instead of the IP to the server, and you will need to exchange that for the actual IP of the machine running buttons.
The link will bring the user to this dialog where they must create a password.
We have increased the demand for password complexity, and it now needs to follow the “8 4 Rule” (Eight Four Rule): 8 = 8 characters minimum length. 4 = 1 lower case + 1 upper case + 1 number + 1 special character.
Authentication methods
If your configuration have Stream Deck Studios. You can scan NFC cards/key-fobs and assign them to a user, a user can have multiple NFCs assigned to them. A NFC can only be assigned to one user as it's intended as a ID in the system
You can also assign a pin code to the user
If needed the NFC Cards/key-fobs can be deleted and the pin can be changed
How to use NFC Cards and Pin codes on surfaces is described in the article about the basic Section.
Assigning a role
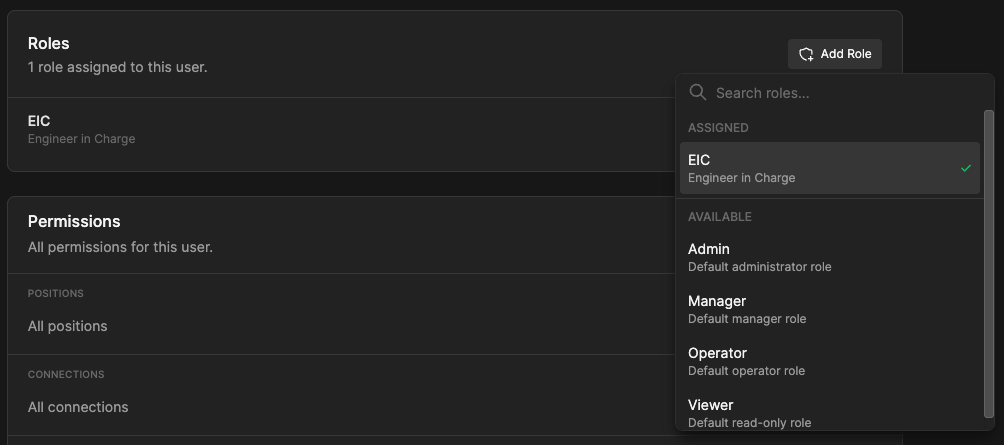
You can add roles to the user through the dropdown menu, you can add multiple roles, so if a user for example is both a Manager and an Operator, both roles can be assigned to the user.
The Permissions assigned to the user will be shown under permissions, and are dependent on the assigned roles.
Create a role
In the roles window you can quickly get an overview of the Permissions given to each role, by hovering your mouse cursor over the symbols.
When clicking the +Create button a dialog box will apear prompting you to give the Role a Name and description.
The new role will be created without any permissions, so you will have to go through and set the permissions, that the role requires.
You can set permissions on a general basis covering all of the current and future elements or on a granular basis only granting Permissions to the elements that the role actually requires.
The colored indicators at the end of the line will show whether the user have all permissions, with a full colored circle, or partial Permissions with a half circle.